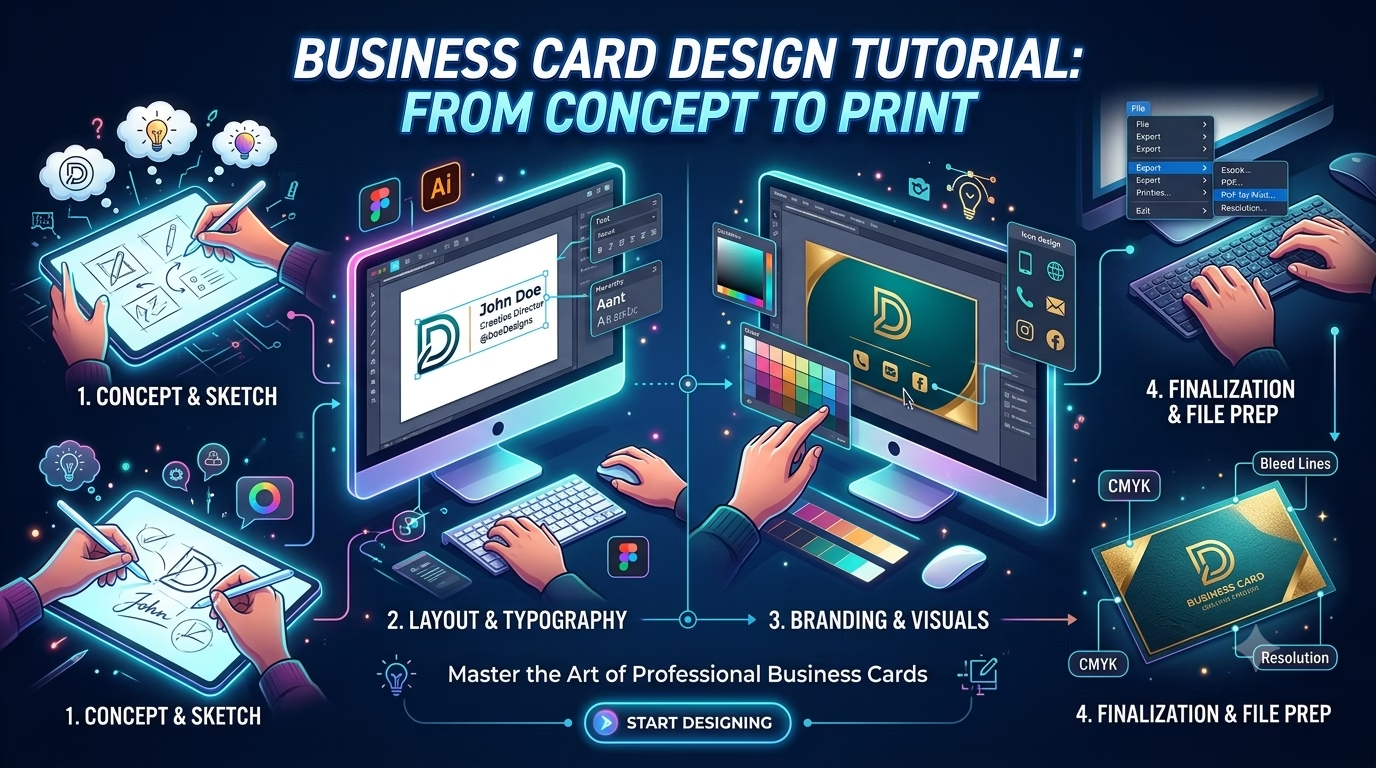

A well-designed business card is one of the most effective marketing tools for professionals and businesses. Whether you’re a graphic designer, freelancer, entrepreneur, or small business owner, learning to create a professional business card in CorelDRAW is an essential skill.
In this tutorial, you’ll learn how to design a print-ready business card from scratch using CorelDRAW 2025.
Why Business Cards Still Matter
Despite the rise of digital marketing, business cards remain valuable because they:
- Create a professional first impression
- Share contact information quickly
- Build trust and credibility
- Promote your brand identity
- Help customers remember your business
Standard Business Card Size
The most commonly used sizes are:
| Country | Size |
|---|---|
| International | 85 × 55 mm |
| USA & Canada | 3.5 × 2 inches |
| Square Card | 65 × 65 mm |
| Mini Card | 70 × 28 mm |
For professional printing, always add a 3 mm bleed on all sides.
Step 1: Create a New Document
- Open CorelDRAW 2025.
- Click New Document.
- Set the page size to 85 × 55 mm.
- Choose CMYK colour mode.
- Set the resolution to 300 DPI.
- Enable bleed (3 mm).
Step 2: Set Up Guidelines
Use guidelines to keep your layout clean:
- Outer Edge: Bleed Area
- Safe Margin: 3–5 mm inside the edge
- Centre Guide: Optional for alignment
This prevents important text from being cut during printing.
Step 3: Choose a Background
You can use:
- Solid colour
- Gradient
- Abstract shapes
- Minimal white background
- Dark premium theme
- Corporate blue theme
Keep the background simple so the information remains easy to read.
Step 4: Add Your Logo
Place your company logo near the top or one corner.
Use a vector logo (CDR, SVG, AI, or EPS) whenever possible for the best print quality.
Step 5: Add Business Information
Include only essential details:
- Name
- Job Title
- Company Name
- Mobile Number
- Email Address
- Website
- Office Address
- Social Media (optional)
Example:
Muhammad Shafiq
Graphic Designer
MSB GRAFIX
📞 +966 XXX XXX XXX
Step 6: Select Fonts
Use clean, professional fonts such as:
- Poppins
- Montserrat
- Roboto
- Helvetica
- Open Sans
- Lato
Avoid using more than two font families on one card.
Step 7: Choose Brand Colours
Use your company’s branding colours.
Popular combinations include:
- Black & Gold
- Blue & White
- Navy & Grey
- White & Green
- Red & Black
Maintain strong contrast between the background and text for readability.
Step 8: Add Icons
You can include simple icons for:
- Phone
- Website
- Address
Use a consistent icon style throughout the design.
Step 9: Add a QR Code
A QR code can link directly to:
- Your website
- Portfolio
- Google Maps location
- WhatsApp chat
- LinkedIn profile
- Digital business card
This makes it easier for clients to connect with you.
Step 10: Design the Back Side
The reverse side can include:
- Large logo
- Company slogan
- Services
- QR code
- Social media handles
- Brand pattern or illustration
Keep it uncluttered and visually balanced.
Print Settings
Before sending the file to a printer:
- Convert text to curves (if required by your printer).
- Use CMYK colour mode.
- Ensure all images are 300 DPI.
- Include bleed and crop marks if requested.
- Save both the editable CDR file and a high-quality PDF.
Common Mistakes to Avoid
- Using RGB colours for print
- Low-resolution images
- Too many fonts
- Small, unreadable text
- Overcrowded layout
- Missing bleed
- Poor alignment
- Excessive design effects
Business Card Design Tips
- Keep plenty of white space.
- Use a clear visual hierarchy.
- Make your logo the focal point.
- Align elements consistently.
- Stick to your brand colours.
- Use high-quality vector graphics.
- Double-check spelling and contact details before printing.
Practice Projects
Improve your skills by creating business cards for:
- Graphic Designer
- Restaurant
- Real Estate Agency
- Construction Company
- IT Company
- Beauty Salon
- Photographer
- Lawyer
- Doctor
- Car Showroom
Frequently Asked Questions (FAQs)
What colour mode should I use?
Use CMYK for professional printing. RGB is better suited for digital screens.
Should I use both sides of the card?
Yes, if you have additional information such as services, a QR code, or branding elements.
What file format should I send to the printer?
Most printers prefer a print-ready PDF, though they may also accept CDR, AI, or EPS files.
How much bleed should I add?
A 3 mm bleed is the standard recommendation for most commercial printers.