Method 1: Using the Windows 11 Media Creation Tool
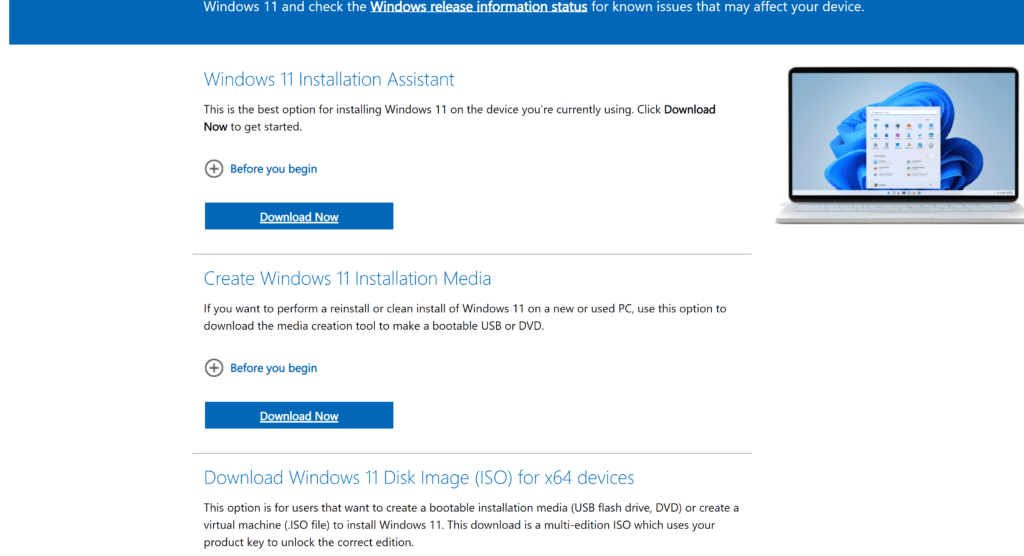
- Download the Windows 11 Media Creation Tool from the official Microsoft website.
- Connect a USB drive with at least 8GB of storage to your computer.
- Open the Media Creation Tool and follow the on-screen instructions.
- Select “Create installation media for another PC” and click “Next”.
- Choose your language, edition, and architecture (32-bit or 64-bit) and click “Next”.
- Select “USB flash drive” as the media to use and click “Next”.
- Choose the USB drive you connected earlier and click “Next”.
- Wait for the tool to create the bootable USB drive.
Method 2: Using Rufus
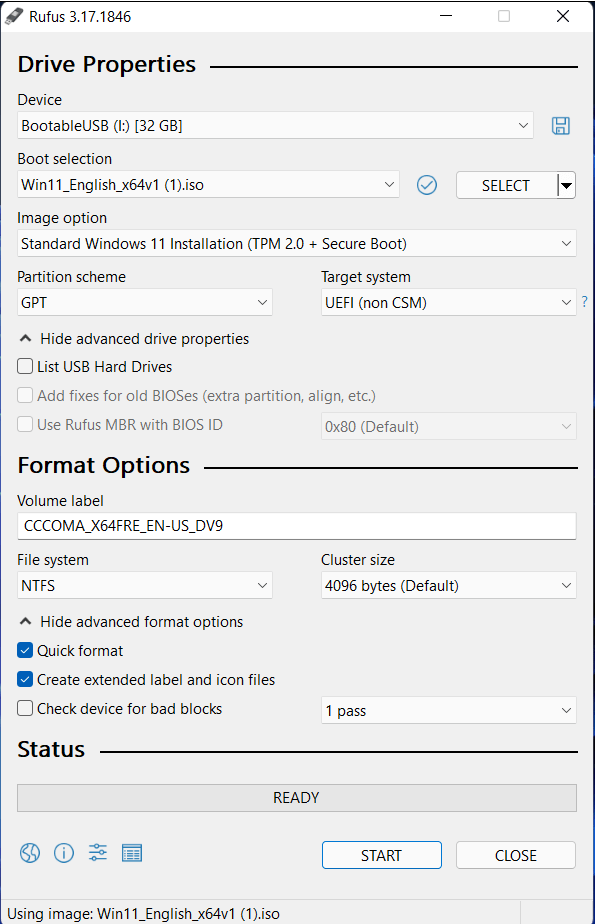
- Download Rufus from the official website.
- Connect a USB drive with at least 8GB of storage to your computer.
- Open Rufus and select the USB drive you connected earlier from the “Device” dropdown menu.
- Under the “Boot selection” section, click on the “Select” button and browse to the Windows 11 ISO file.
- Choose “MBR” as the partition scheme and “BIOS or UEFI” as the target system type.
- Click on “Start” to begin creating the bootable USB drive.
Method 3: Using the Command Prompt
- Connect a USB drive with at least 8GB of storage to your computer.
- Open the Command Prompt as an administrator.
- Type “diskpart” and press Enter.
- Type “list disk” and press Enter to see a list of all the connected disks.
- Type “select disk X” (replace “X” with the number that corresponds to your USB drive) and press Enter.
- Type “clean” and press Enter to remove all partitions from the USB drive.
- Type “create partition primary” and press Enter to create a new primary partition on the USB drive.
- Type “format fs=ntfs quick” and press Enter to format the partition with the NTFS file system.
- Type “active” and press Enter to mark the partition as active.
- Type “exit” and press Enter to exit the DiskPart tool.
- Mount the Windows 11 ISO file on your computer.
- Copy all the files from the mounted ISO file to the USB drive.
- Safely eject the USB drive.
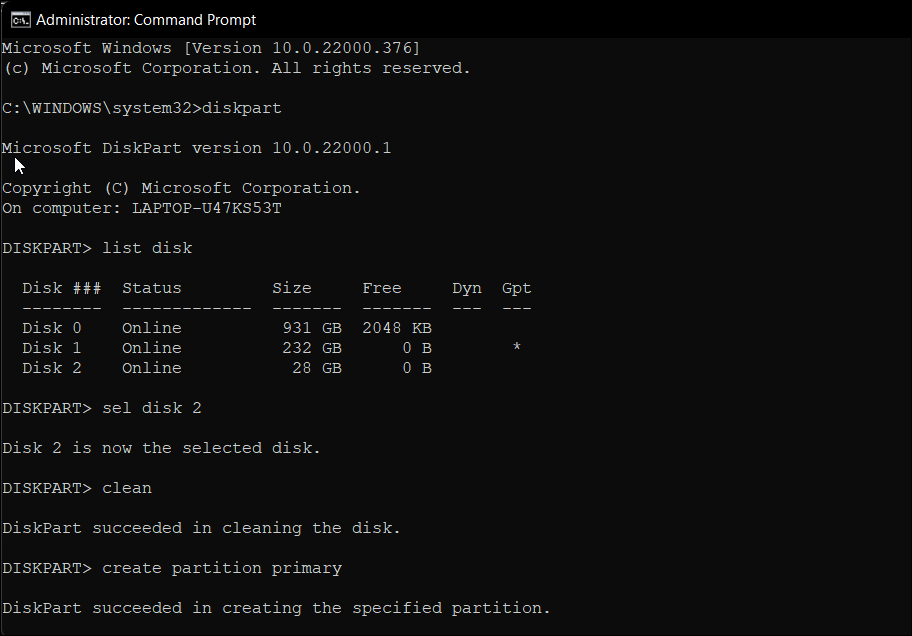
- In the Command Prompt window, type the following command and hit enter to launch the Windows Diskpart utility.
DISKPART - Next, type the following command to list all the available storage devices:
LIST DISK - Here, locate your USB drive. You can look at the Size column to determine your USB drive. In this case, the USB drive is listed as Disk 2.
- Next, type the following command to select your drive:
SEL DISK 2 - In the above command, change DISK 2 with the number assigned to your USB Drive. For example, if you have a single SSD or SATA drive setup, your primary drive will show as DISK 0 and USB drive as DISK 1. It is of extreme importance that you select the right drive as the next step involves wiping clean the selected drive.
- Next, type the following command and hit enter to erase all the content from the drive:
Clean - Next, type the following command to create a primary partition:
Create Partition Primary - Next, type the following command to select the main partition:
List Par
Note: Be sure to double-check that you have selected the correct disk or USB drive before using diskpart, as the command can erase all data on the selected disk.